Bleeding the system and changing the brake fluid
One of the most important - if not the most important - device on the R18 is the braking system. You can do your maintenance yourself.
Especially because, in comparison to other BMW models, the fluid is not changed on the ABS module itself. The valves are also missing.
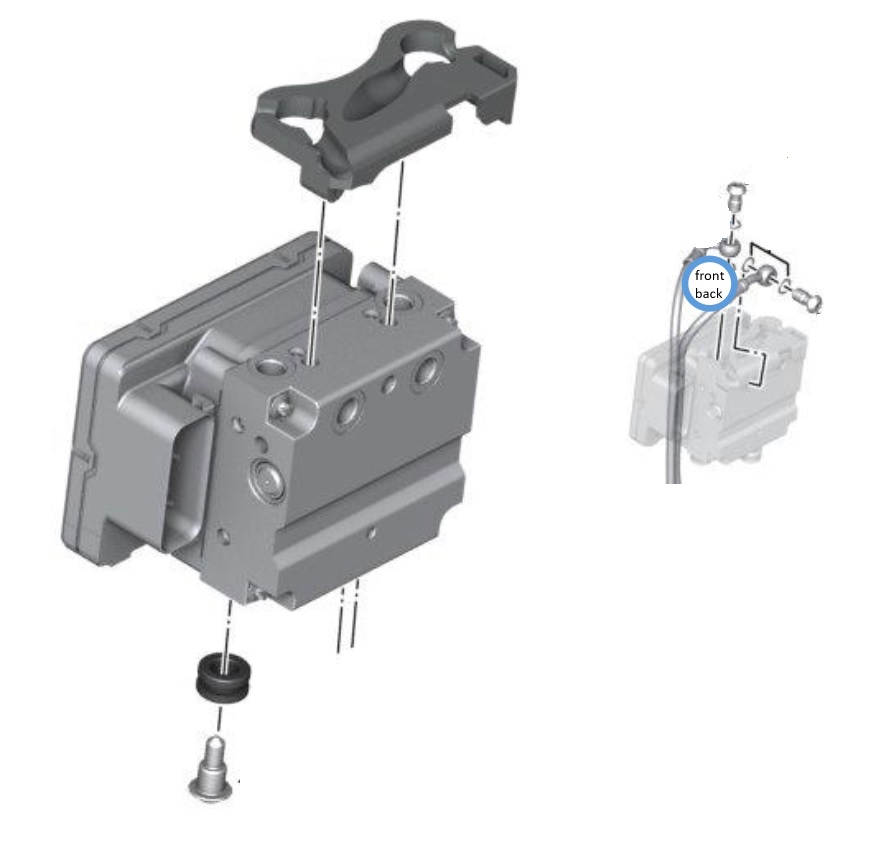
However, if you have never done this work before, you should first bring in an experienced person to watch.
Explanations about the R 18 brake system:
In contrast to the hydraulic dual-circuit diagonal brake position of a car (circle 1 at the front left and rear right // circuit 2 at the front right and rear left) with a foot brake pedal, the main brake is divided into two parts in linepiston (usually called master brake cylinder and wheel brake cylinder)) and a common but divided fluid container, the R 18 & Classic has a partial integral brake system; the excavators and TC have a fully integral brake system.
Explained in simple words this means:
1. Applying the front brake also affects the rear brake.
2. Applying the rear brake has no effect on the front brake.
3. The ABS block modulator in conjunction with the engine control unit is responsible for regulation.
Interior: electrical pressure distribution sensors, control valves, information from the wheel rotation sensors...
4. There is no direct connection between the fluids at the front and rear.
For full braking effect and even wear, both brakes should always be used.
On the R18 there is no master brake cylinder as such. The appropriate name would therefore be hand brake and foot brake cylinders (or pistons).
Both fittings come from Magura (Likeentwirth in Urach).
Even when braking, both containers are only under atmospheric pressure.
The three wheel brake cylinders from BMW, although Brembo (Italy) is installed, are fixed units, as 4 piston fixed calipers and screwed together immovably.
Other versions: movable floating saddle and floating saddle.
Brake calipers are also often referred to as brake calipers because they grip the brake discs like pliers with the brake pads. Not to be confused with the brake piston pliers tool.
The actual work is done by the respective pressure transmitter pistons of the hand/foot actuation via the hydraulic fluid and the pressure transmitter pistons in the brake calipers on the wheels.
Brief information about brake fluids: DOT = US Department of Transportation
Similar to motor oils, it doesn't matter which of the various brands you personally value. Motul is used by some BMW workshops, Tie (Alfred Tewes), a large German manufacturer of braking systems or Liqui Moly.
What is important is the prescribed type designation or higher quality/requirement.
Using unsuitable brake fluid can cause rubber parts to swell.
The manufacturer is in the background Fuchs-Petrolub-Pentosin with plants in Mannheim, Dormagen and Wedel (Schleswig-Holstein).
Brake fluid is poisonous and corrosive: observe instructions for use and dangers
DOT 4 (BMW recommends LV – low viscosity) or preferred DOT 5.1 250 ml is enough.
Both types based on glycol alcohol can be mixed.
Glycolic alcohol is made from glycerin based on petroleum or vegetable oil.
Do not use old leftovers.
DOT 5.1 has a higher boiling point and lower hygroscopy at the same price as DOT 4.
Colors whitish, reddish, amber.
For the sake of completeness:
Among other things, it offers
Tie with DOT 4 type 200 Racing brake fluid Traditionally blue-colored brake fluid, mixable with DOT 4 / 5.1.
At least 10 dealers (who are not manufacturers) still have it SL 6 DOT 4, DOT 4 LV[low viscosity], DOT 4 R[racing] and DOT 4 More on offer.
The attributes behind it promise “particularly suitable for ABS”, a longer shelf life in the tin can!! From larger thin liquids in all temperature ranges and higher boiling points to their particular suitability for off-road use.
This is not necessary for use in normal operation and under normal conditions.
Conclusion: The brake system is well filled with DOT 5.1.
DOT 5 (based on silicone) is generally not allowed, it is not compatible with the changeover residues of DOT 4/5.1 that always remain in the system.
When using DOT 5, the entire system must be flushed to neutral after it has been completely drained.
Color violet.
The increasing water absorption of brake fluid over time is influenced by the use of the motorcycle such as frequent washing, riding in the rain and storage.
A fixed specification for changing the brake fluid is therefore not possible.
General recommendation; every 2 years. BMW recommendation: after 10.000 km or one year, then every two years.
Due to the low time and cost involved with DIY, it can also be done annually.
The moisture content can be determined with a brake fluid testing device (from €4,45), the actual usage value may be doubtful because measurements are only taken in the container, but not in the brake calipers.
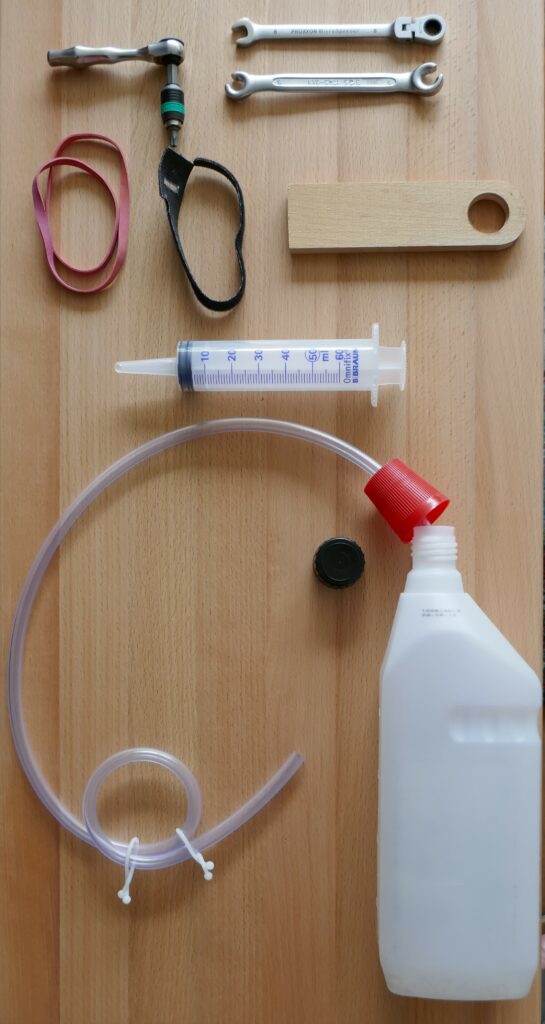
needed tools
screwdriver (Bit) TORX 25
Open-end wrench SW 8, Ring spanner SW 8 or open ring spanner SW 8.
———————————————————————–
Velcro binder, Use on the handbrake lever when another person is not available.
piece of wood, used on the foot brake lever, remainder of a bar 40 x 10 mm, 110 mm long
———————————————————————–
receptacle with screw cap
for
fuel hose, transparent, length approx. 1 m, inner diameter 6 mm
Possibly.
disposal vessel for delivery point
Brake fluid must not be disposed of with/in used oil
Cleaning rags, paper towels
The tools are suggestions.
Various professional devices are available commercially from €15 to €300.
Procedure
Bleeding the system and changing the brake fluid are largely identical tasks.
Form the hose into a loop at one end and attach the other end to the collecting container.
The bike does not necessarily have to be vertical at this point. Check the fill level in the sight glass.
Protect the area near the place of use (tank/tires/rims) against splashes, as brake fluid is corrosive and softens the paint.
Loosen and remove the screws on both container covers. The lids are often a bit tight.
Do not use sharp-edged tools!
Carefully tap the lid on all sides with the wooden handle of a hammer, loosen it with your fingernails and place it in a clean place.


Empty the contents of both containers, approx. 50 ml each, into the collection or disposal container – ideal by syringe. To avoid damage from splashes, cover the parts around the container with cloth.
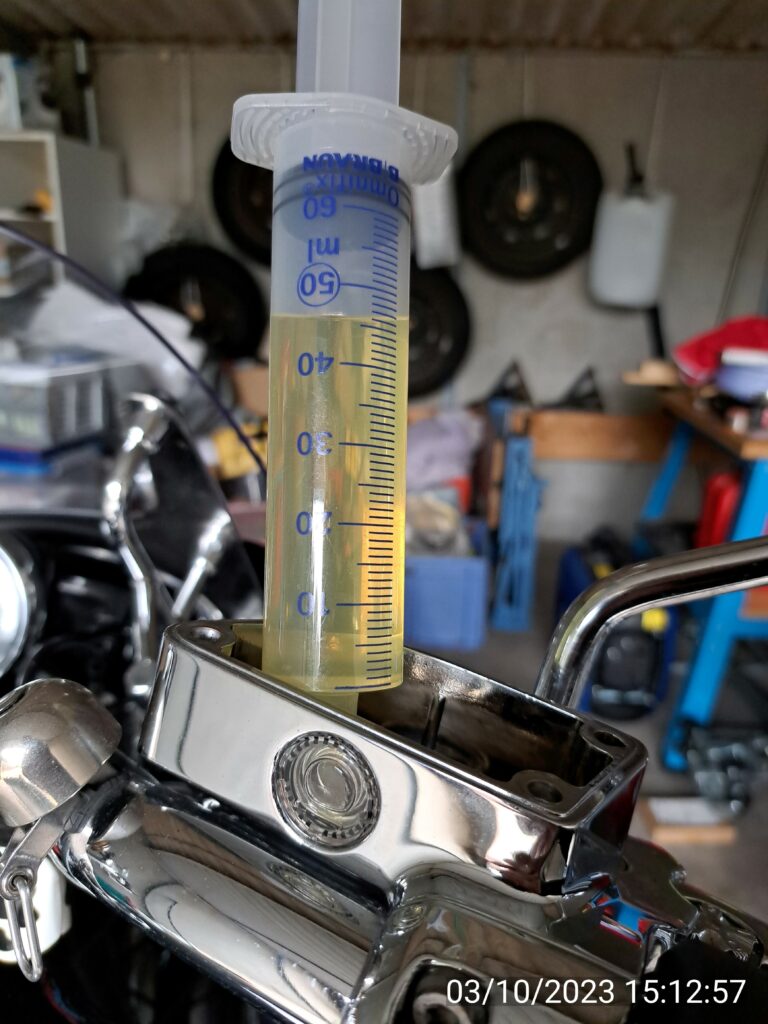
Fill both containers freshly with brake fluid up to the top edge of the sight glass and press the container covers loosely on. Brake fluid may accidentally spray out when pumping.
It doesn't matter whether you start first at the front or at the back.
Remove the dust cap for the bleeder valve on the brake caliper.
Pull the hose with the loop tightly over it.
If you start at the front, put the handbrake lever in the pressure position and hold it against the driving twist grip.
If you start at the back, put the foot brake lever in the pressure position and support it against the cylinder ribs.

Bleed screw (valve) do not unscrew completely.
Open just a little until brake fluid comes out.
The brake pads can also be pushed inwards using a suitable tool so that the last bit of old brake fluid is pushed through the pistons into the circuit.
If the brake fluid flow stops, close the valve.
Release the brake lever and repeat pressure build-up.
Observe the brake fluid level in the sight glass; If necessary, refill up to the lower ring of the sight glass.
Open the valve again and close it again when the flow stops.
Brownish to blackish brake fluid can escape right from the first pump strokes.
This is normal for operational reasons. Every time the brake is released, the brake pistons move back into the cylinder and draw small amounts of dust into the system.
Repeat this process until fresh brake fluid comes out.
This may not be easy to see if there are no color differences between brake fluid verbraucht and fresh are recognizable.
Fill the loop two to three times by pumping, watch for bubbles coming out of the valve and let it drain into the collecting vessel. This means that the system branch is well flushed and freshly supplied.
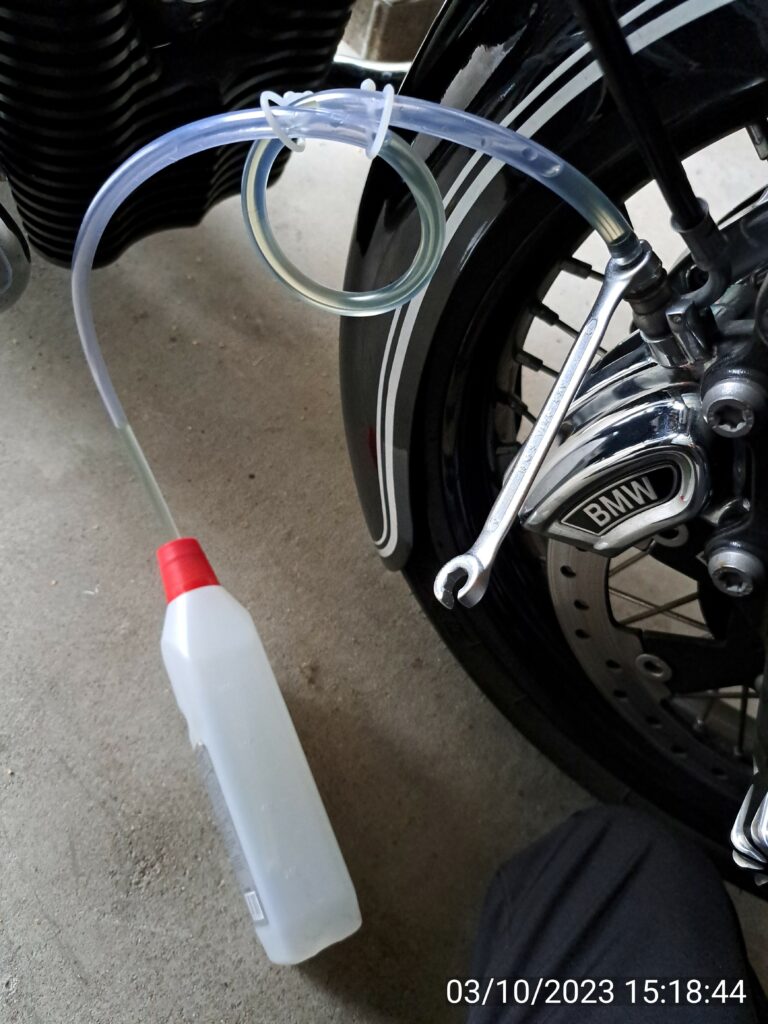
Note: Don't forget the brake caliper on the opposite side!
Empty the rest of the loop into the collecting container and quickly pull off the hose with a cleaning cloth without making a mess.
The inside diameter of the brake lines is a maximum of 3 mm.
A 2 m long cable run therefore contains a maximum of 14 ml.
Note: Lebmann offers the BMW HP Race brake bleeder valve K46 for operation by one person.
The hose and collecting vessel are still necessary; the valves only have a backflow function.
https://www.leebmann24.de/satz-hp-race-bremsen-entlueftungsventil.html
Check that the valves are tightly closed, remove any drips, and don't forget the dust caps.
Position the bike as vertically as possible and fill the level of brake fluid at the front and rear to the middle of the sight glass.
Put on container covers, do not use sealants, oils or grease on the lid seal.
A very thin application of is permitted

it is also compatible with the brake fluid.
The screws only hold the cover, place them with your fingers and tighten slightly by hand.
Do not use a torque wrench or screw locking device!
The containers are made of soft die-cast zinc.
Test drive with brake test and check for leaks.
Finally, the brake pressure sensors should be checked for pressure resistance.
To do this, simply press the hand and foot brake levers firmly one after the other while standing and hold them in position.
No lever should give noticeably within 10 to 20 seconds.
If this is the case, then there is a suspicion that the piston sealing rings (rubber) in the fitting are worn out. The pressurized brake fluid slowly flows back into the container between the piston and cylinder.

Note: In the case of brake calipers, sealing rings with the same function are not located on the pistons.
They are embedded in grooves in the cylinders and are still called piston seals. *)
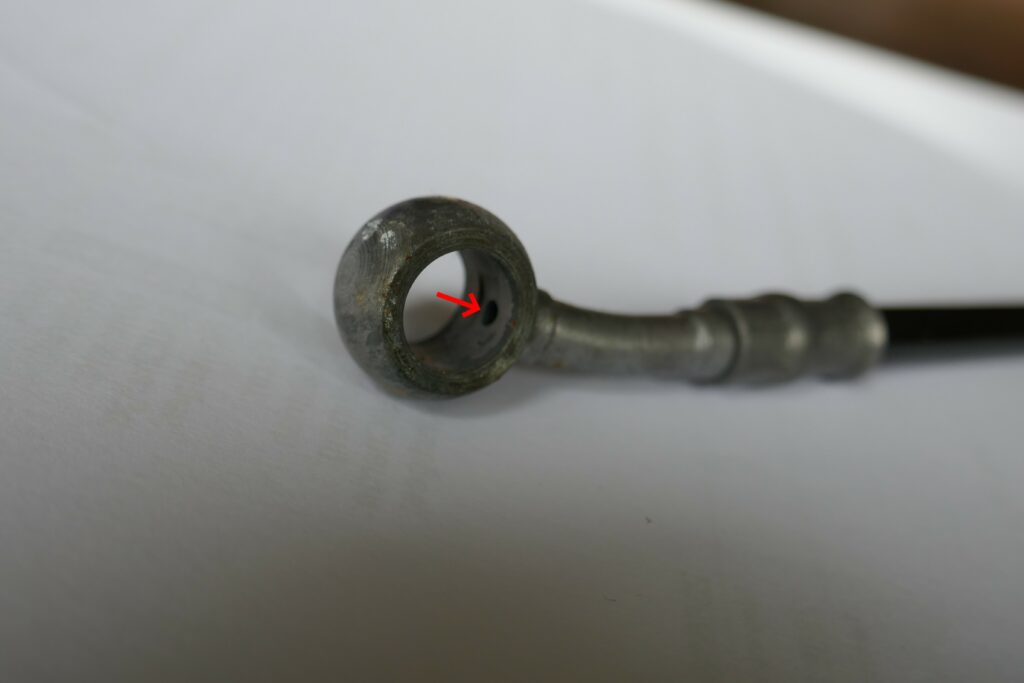
The reader certainly didn't miss the unusual bleeder valve on the rear brake pressure sensor/foot brake cylinder.
In terms of the screw connection, this is called a threaded nipple.
Correct name is Banjo screw with integrated vent valveAlso Combination brake bleeder valve.


More on this in future descriptions.
———————————————————————–
R18 riders report that the method of changing the brake fluid is identical to the BMW R1200GS. This video is recommended for this.
If anyone has a video for the R18, I'll be happy to publish it.